Collaborative College Keyboard Project
During my second semester of college, some friends and I decided to build custom split mechanical keyboards.
One of these friends owns a positively obscene number of keyboards, as he picks them up from garage sales and craigslist deals for cheap. He had several copies of the same keyboard, so I walked in to my room one day to find an Apple Extended Keyboard II on my desk. I’d been wanting to build an Ergodox for a couple of years, so this was an opportunity to do so in a cost-efficient manner. The other three members of our party had previously worked with custom keyboards, so we decided to start a project to build a bunch of cheap, custom Ergodox variants.
One of our classes this semester required a final project that employs sensors in some manner. Luckily, our professor agreed that mechanical keyswitches were a kind of sensor, heehee. Two birds, one stone.
Overview
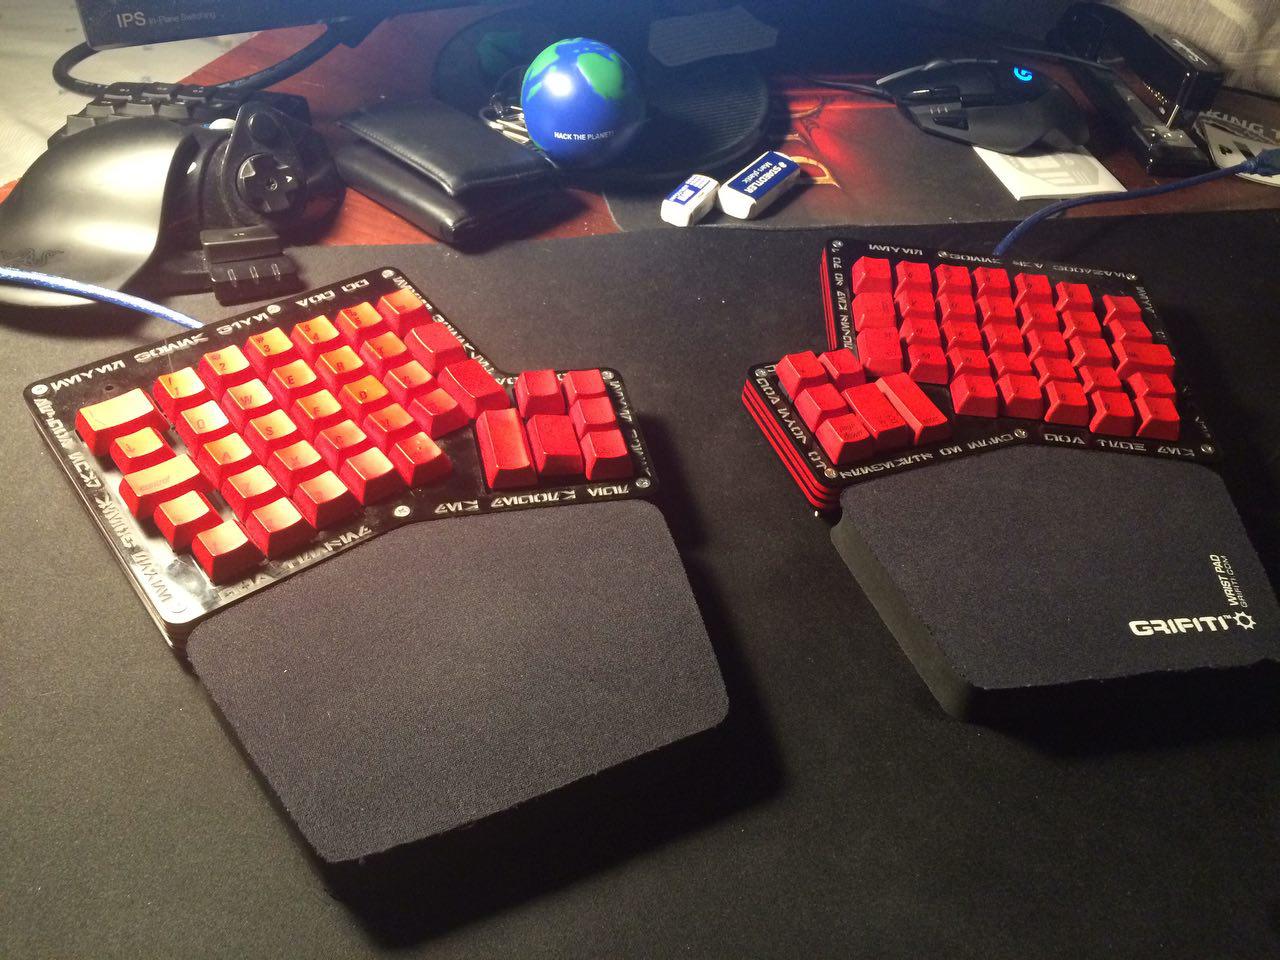
Custom-built Ergodoxes tend to employ sandwiched layers of components held together with screws in some kind of case material. We employed a few different materials - wood, acrylic, and beige PBT, according to taste/willingness to spend on extra materials.
Keyboards are relatively simple devices. They need a microcontroller to interpret keypresses, diodes to prevent backwards current flow, and keycaps/keyswitches to create the keypresses.
My personal goal was to minimize cost relative to a prepurchased kit. My final cost was about $150, which is a $50 cheaper than the cost of a Massdrop’d Ergodox kit, even with a $50 splurge for cheap acrylic to make the case prettier/tackier.
We decided to avoid PCBs to save money, and instead used just aluminum and steel plates that we got machined for cheap. Additionally, to simplify soldering/thinking, rather than go the route of IO extender + Teensy, we opted for two Teensies, one in each half. In retrospect, macOS hates this and refuses to treat my keyboards normally, but what’s done is done. (Apparently you can just download Karabiner to fix the problem but it’s currently broken for Sierra so /shrugemoji).
Most of the hardware and software portions of this project were greatly simplified thanks to matt3o’s BrownFox guide over on Deskthority.
Desoldering
We began by desoldering our donor keyboards (damped Alps cream) and collecting the switches. For the purpose of removing keyswitches, desoldering bulbs with heating elements are much, much better than solder suckers and braid. Some of the switch pins were bent in the board by design or corroded due to age, but we had enough leftover switches that we could avoid using any broken ones. Nonetheless, a few switches did break after we installed them in our plates, but had enough of a solderable contact sticking out that we simply rolled with it and continued soldering.
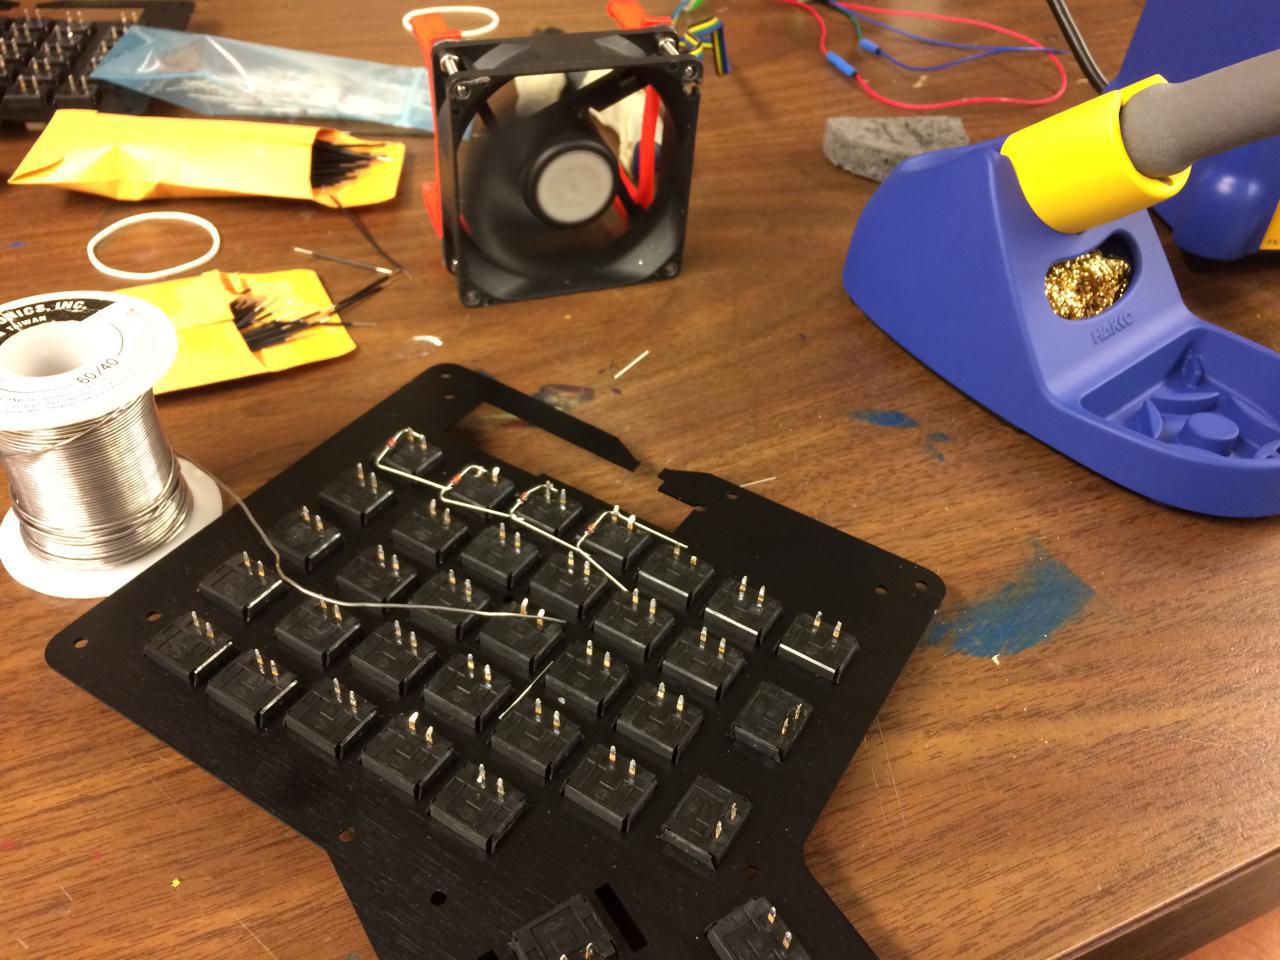
Resoldering - Key Matrix
Building a custom keyboard requires designing a matrix for the layout of the keys. Normally, you might connect each individual switch to a pin on the microcontroller so that the controller knows which key is being pushed at one time. Since the Teensy’s only got a limited number of input pins, you use a 2d “key matrix” to expand the maximum number of individual keys past the number of pins on the teensy.

This involves a considerable amount of planning, and then debugging where we fucked up. Neither of which are terribly fun, but hey. We did this to have fun making things/suffering together.
Layout
I type dvorak, so that’s what I ended up designing my primary layout to be. (tbh I was lazy with my qwerty layout, so it’s actually a bit buggy.) I’m not totally happy with it, since a lot of keys I tend to need for code (eg |, ~, []) are weirdly placed, but that could be partly that I’m just not familiar with the layout since I don’t use it to code much.
Standard text input is pretty solid - it’s not much different from a regular keyboard - but anything beyond that still feels weird, and I’ve been using the keyboard over a year.
Case Design
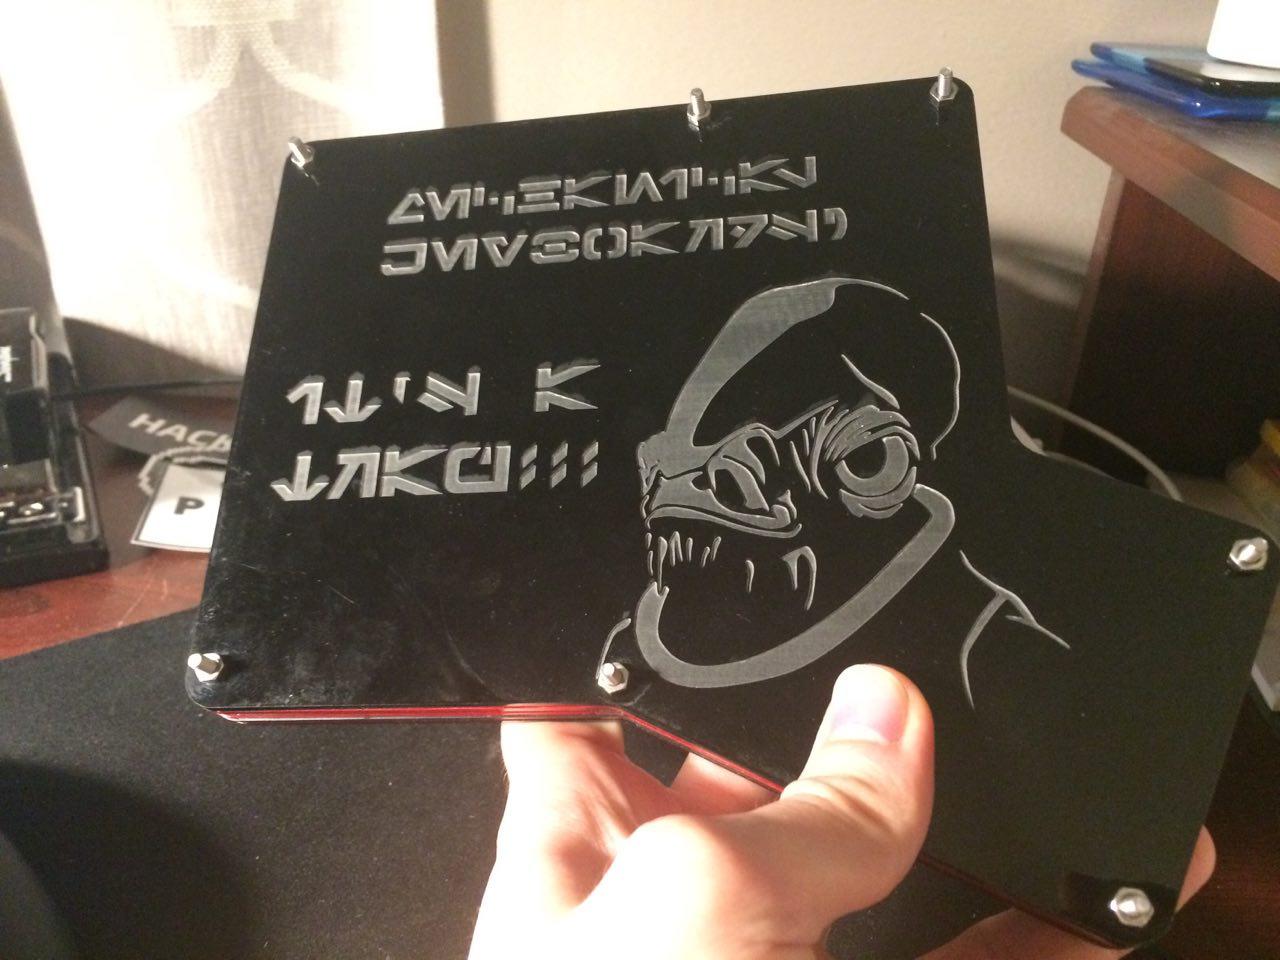
Plain and simple would’ve been boring. We opted for memes. Lasercut acrylic. Star Wars galactic basic for “MECHANICAL KEYBOARDS? IT’S A TRAP!!!”. Oh, and the text wrapping around the keyboards on the top side is the refrain of That Song.
Altogether, I had fun soldering with my friends for ~20 hours, and I’m glad to have shmancy keyboards that I use every once in a while. I’ve taken them to the ECE building a couple of times (for coding all-nighters where I wanna be comfortable in the lab) and gotten “whoa nice keyboards dude”. I’m pretty happy with em! It was a fun project overall.